
Windows
You will install the official WireGuard app, load the configuration file you downloaded from us, and switch it on. It takes about two minutes.
Get the official WireGuard app
The pictures below are diagrams rather than photographs of a real screen, so your version of the app may look a little different. The names in quotes are what matters — those are exact.
-
1 Download your configuration file
On your dashboard, select “Download configuration file”. It saves to your Downloads folder and ends in
.conf. Keep it private: anyone who has this file can use your subscription.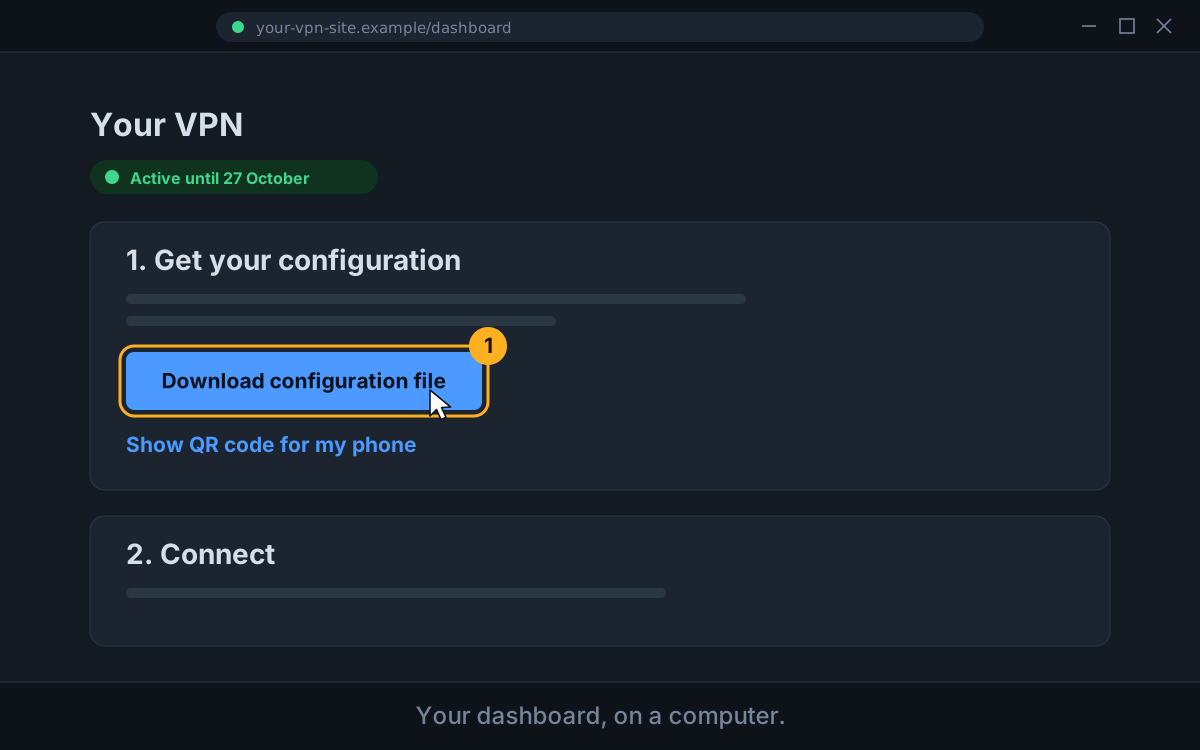
-
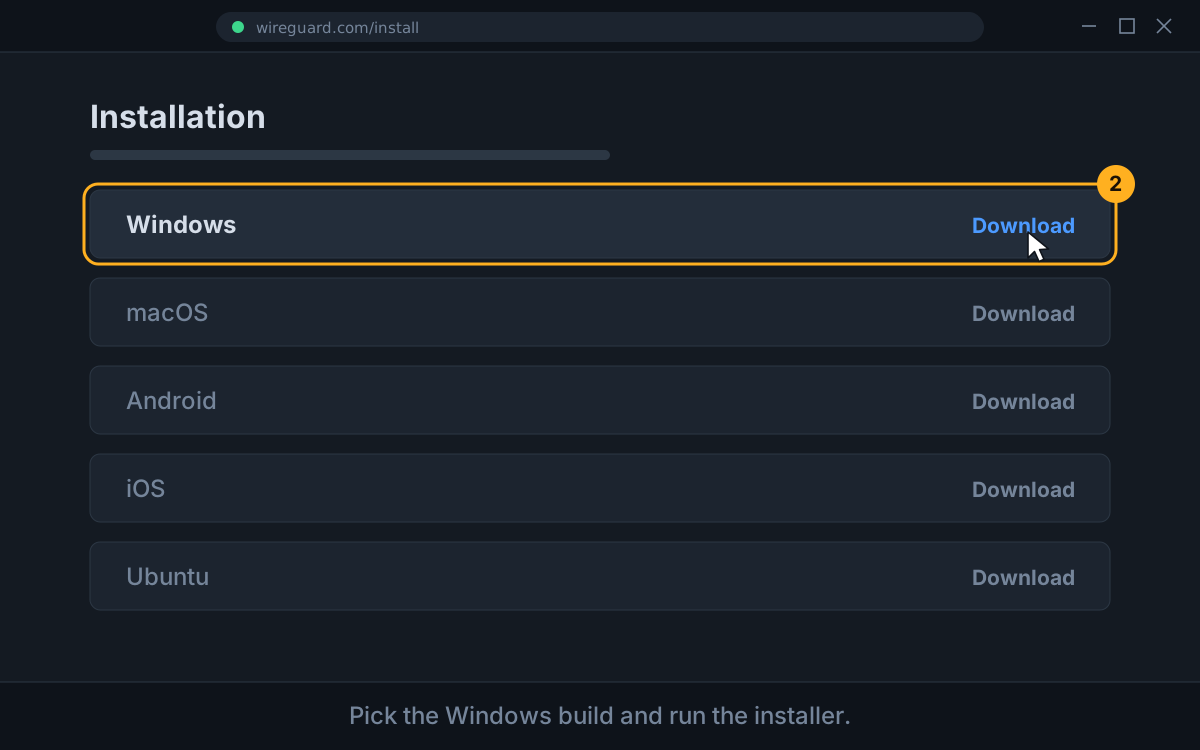
2 Install WireGuard
Go to wireguard.com/install and choose the Windows download. Run the installer and accept the prompts. Windows may ask for permission to make changes — this is expected, because a VPN changes how your computer connects to the internet.
-
3 Add your tunnel
Open WireGuard. The window is empty the first time. Select “Import tunnel(s) from file” at the bottom left, then pick the
.conffile you downloaded.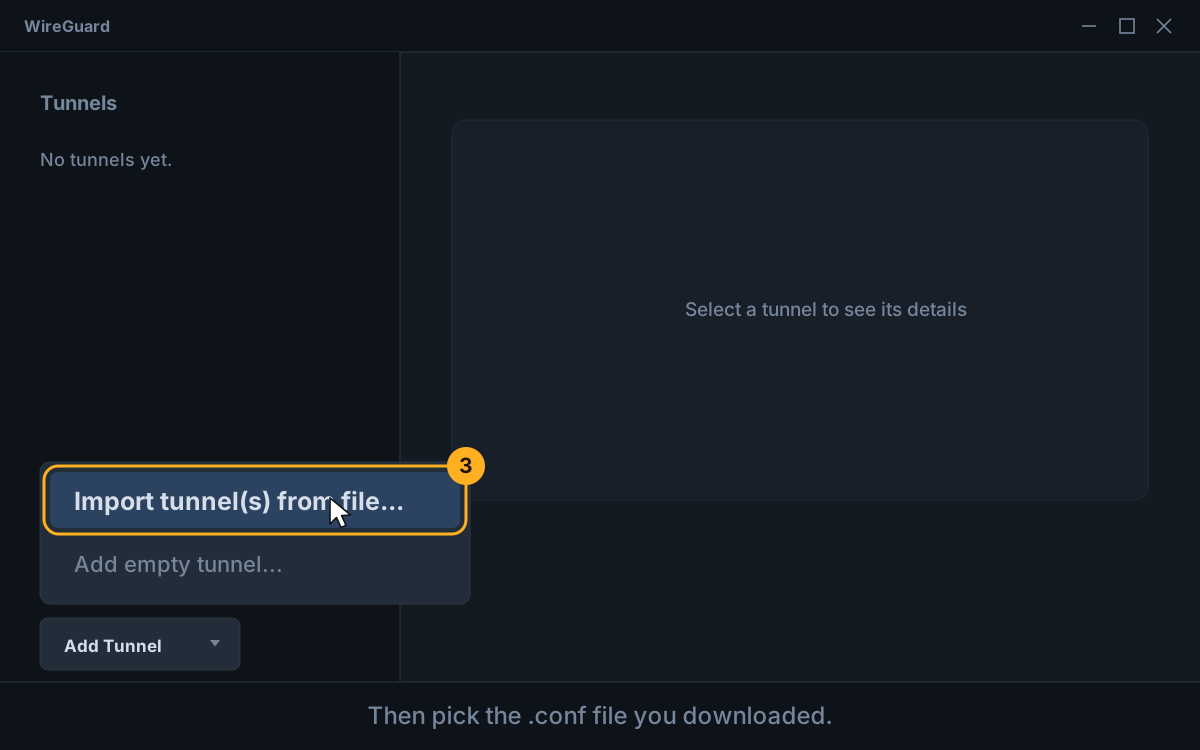
-
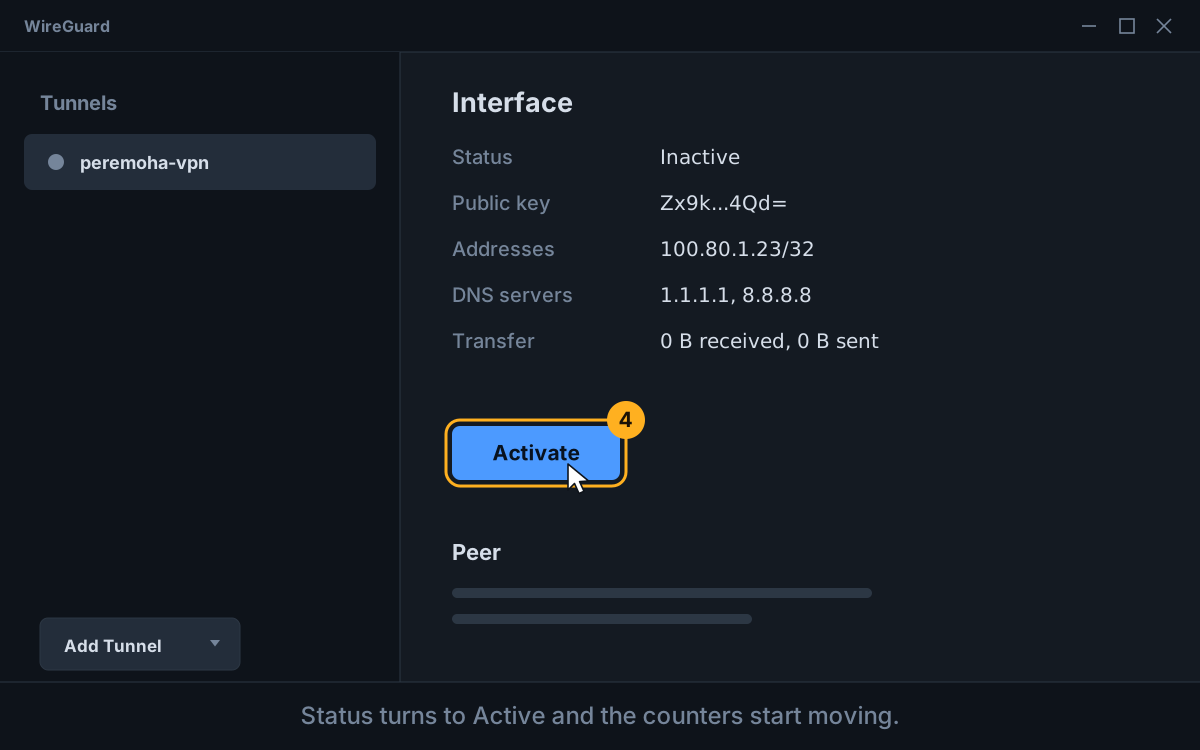
4 Connect
Your tunnel now appears in the list. Select it, then select “Activate”. The status changes to Active and the transfer counters start moving.
How do I know it is working?
Open a browser and search for “what is my IP”. The address shown should be different from the one you saw before connecting. If it has not changed, the tunnel is not active.
Disconnecting
Open WireGuard, select your tunnel and choose “Deactivate”.
Other devices: macOS · Linux · Android · iPhone & iPad